Kayhon Rabbani
A 22 year old male who has no past medical history presented with a 3 day history of viral URI-like symptoms with sore throat, dry cough, shortness of breath, and dyspnea on exertion. The patient was an active marine recruit with many other members in his company being sick during this time. Shortly prior to arrival, the patient became unable to walk short flights of steps without becoming short of breath. The patient otherwise had no respiratory or cardiac history. He had no family history of sudden cardiac death or early MI. The patient denied fevers, chills, chest pain, pleuritic chest pain, positional chest pain, abdominal pain, flank pain, dysuria, hematuria, diarrhea, or any other associated symptoms.
Vitals: BP 87/56 | Pulse 96 | Temp 98.6 °F (37 °C) | Resp 28 | SpO2 92%
On physical examination, the patient was alert and in acute distress. Patient presented with tachycardia, hypotension, hypoxia, and tachypnea. Mucous membranes were dry. Respiratory exam revealed decreased air movement, breath sounds, and faint crackles in the right lower lung field.
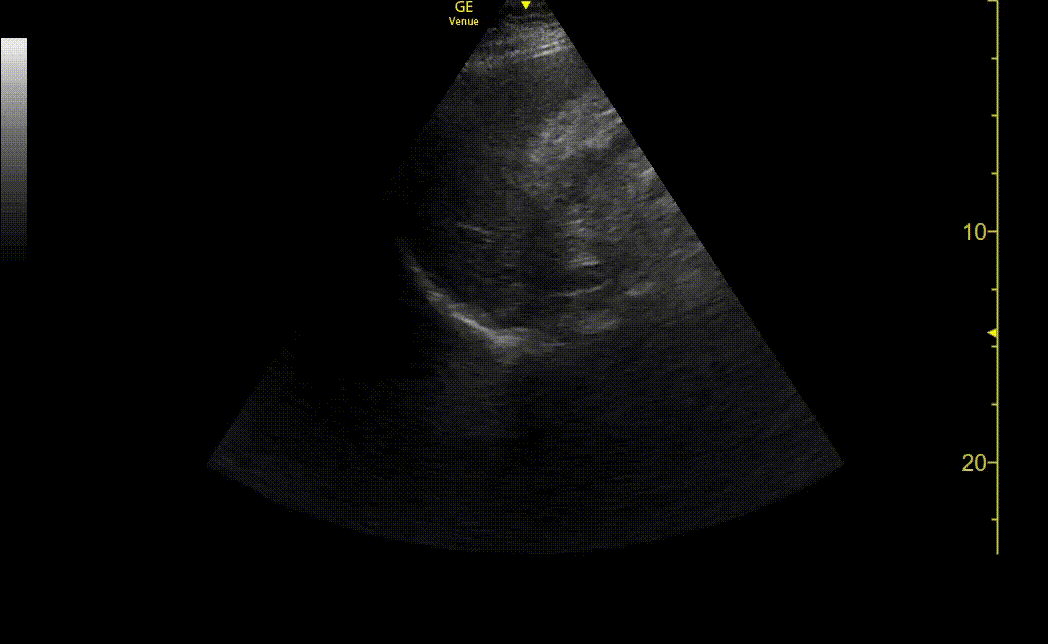
A bedside echocardiogram was performed.

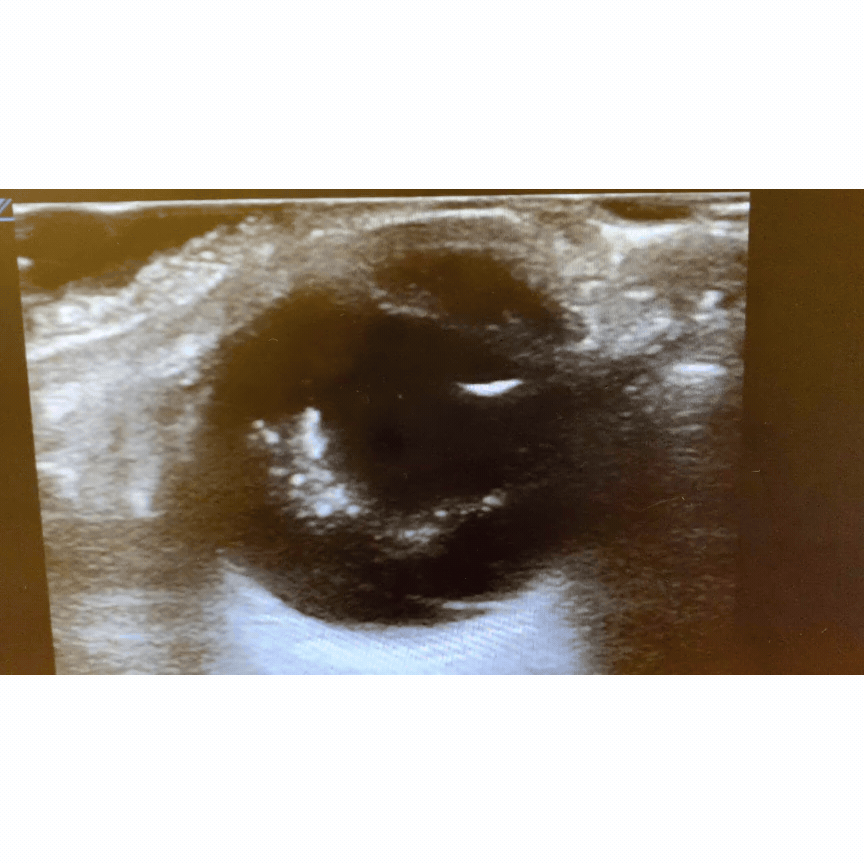
Figure 1: POCUS echocardiogram in 4 chamber apical view demonstrating a small pericardial effusion.

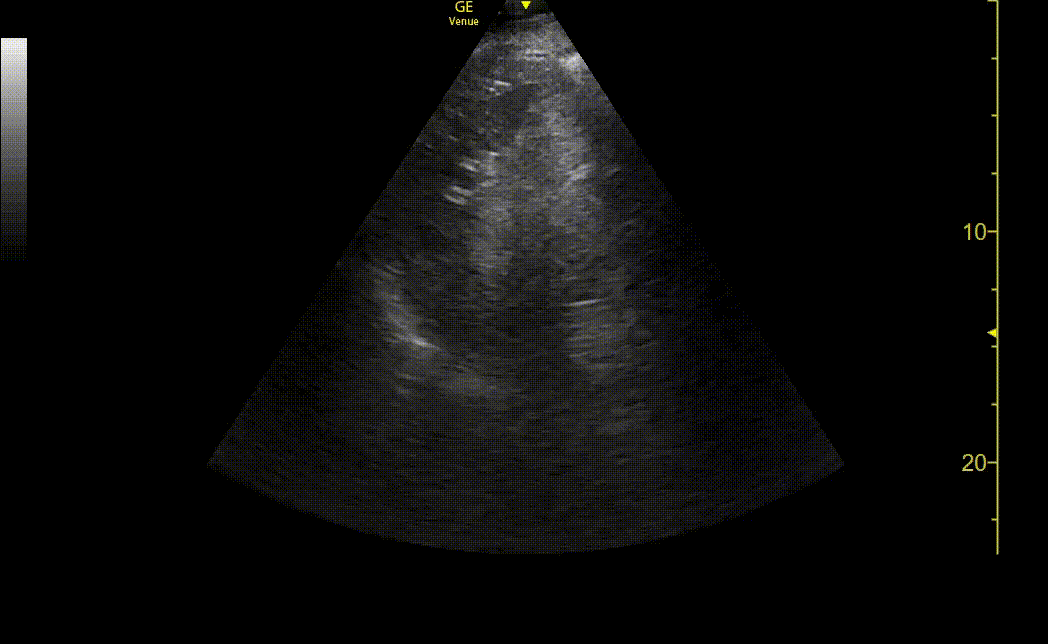
Figure 2: POCUS lung exam revealed bilateral B lines anterosuperior aspects of the lungs.

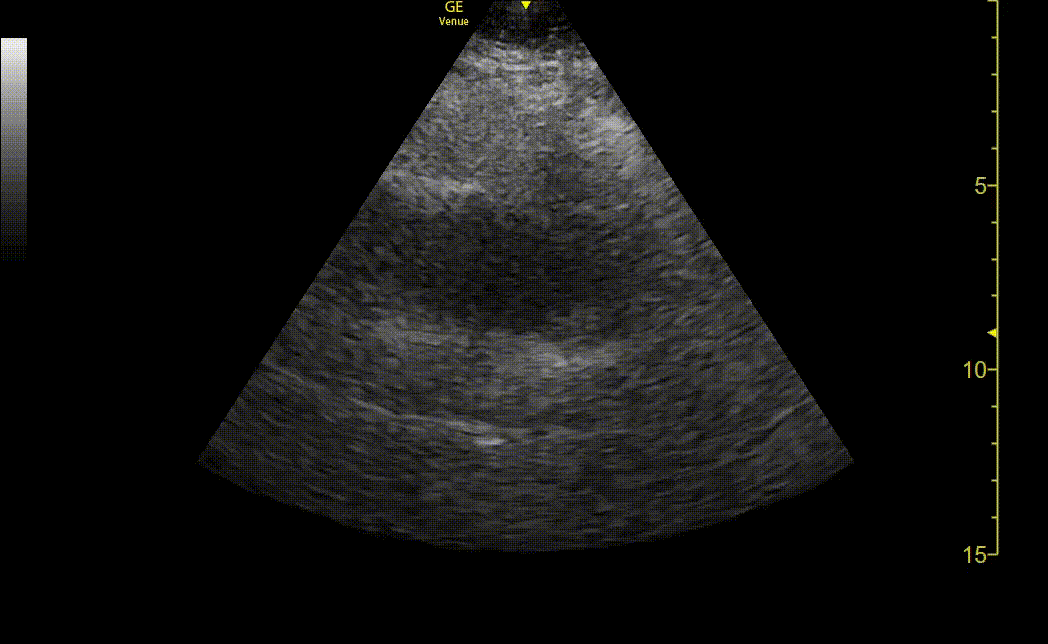
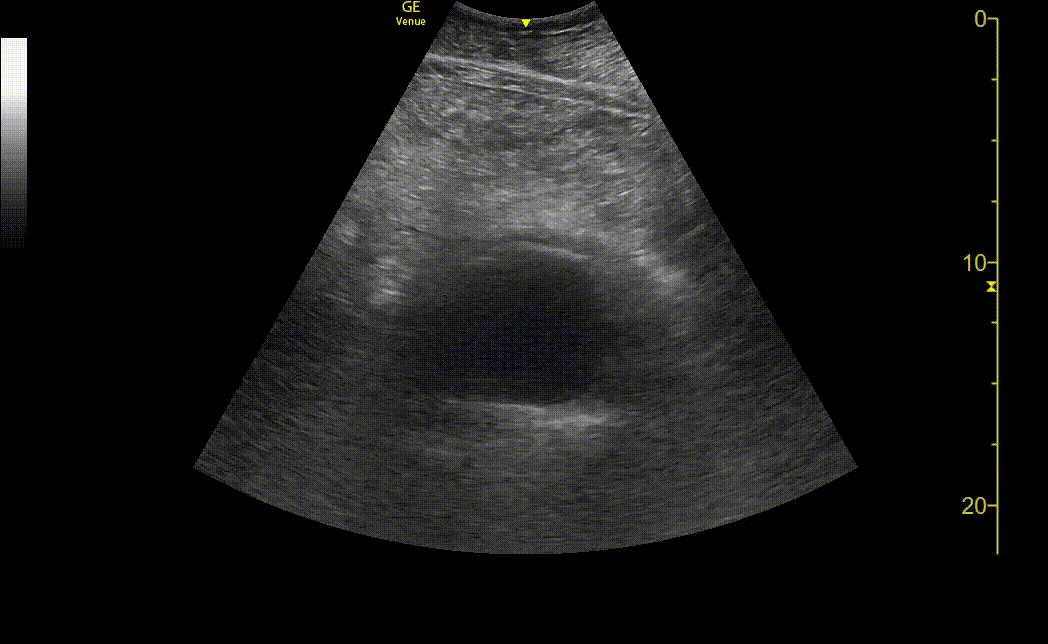
Figure 3: Lung consolidation and pleural effusion demonstrating positive "spine sign."
The patient was initially stable but desaturated upon position change. The patient was persistently hypoxic with significant work of breathing on BiPAP before escalating to intubation, remaining persistently hypoxic in the mid 80s post intubation on a ventilator.
Discussion
Acute respiratory distress syndrome (ARDS) is a severe form of acute respiratory failure characterized by rapid onset of widespread inflammation in the lungs. It is defined by the Berlin criteria, which include acute onset within one week of a known clinical insult, bilateral opacities on chest imaging not fully explained by cardiac failure or fluid overload, and severe hypoxemia with a PaO2/FiO2 ratio of less than 300 mmHg.[1-3]
Common differential diagnoses for ARDS include cardiogenic pulmonary edema, pneumonia, and pulmonary embolism. Cardiogenic pulmonary edema can be differentiated by the presence of signs of fluid overload and cardiac dysfunction, often confirmed by echocardiography. Pneumonia may present with localized infiltrates and clinical signs of infection, while pulmonary embolism typically presents with sudden onset dyspnea, pleuritic chest pain, and may be confirmed by imaging studies such as CT pulmonary angiography.[1][4-5]
On physical examination, patients with ARDS often present with tachypnea, dyspnea, and diffuse crackles on auscultation. Hypoxemia is a hallmark, and patients may exhibit signs of respiratory distress such as use of accessory muscles and cyanosis. Imaging studies, particularly chest radiography, typically reveal bilateral alveolar infiltrates. Computed tomography (CT) scans can provide more detailed images, showing patchy or diffuse ground-glass opacities and consolidations.[1-2][6]
Point-of-care ultrasound (POCUS) is a valuable tool in the diagnosis and management of ARDS. Lung ultrasound findings in ARDS include the presence of multiple B-lines (indicating interstitial syndrome), spared areas, pleural line thickening, and subpleural consolidations. Cardiac ultrasound can help differentiate ARDS from cardiogenic pulmonary edema by assessing left ventricular function and the presence of pleural effusions.[7] Combining lung and cardiac ultrasound can enhance diagnostic accuracy and guide management decisions in critically ill patients with acute hypoxemic respiratory failure.[7]
References
- Saguil, A., & Fargo, M. V. (2020). Acute Respiratory Distress Syndrome: Diagnosis and Management. American family physician, 101(12), 730–738.
- Meyer, N. J., Gattinoni, L., & Calfee, C. S. (2021). Acute respiratory distress syndrome. Lancet (London, England), 398(10300), 622–637. https://doi.org/10.1016/S0140-6736(21)00439-6
- Matthay, M. A., Zemans, R. L., Zimmerman, G. A., Arabi, Y. M., Beitler, J. R., Mercat, A., Herridge, M., Randolph, A. G., & Calfee, C. S. (2019). Acute respiratory distress syndrome. Nature reviews. Disease primers, 5(1), 18. https://doi.org/10.1038/s41572-019-0069-0
- Papazian, L., Calfee, C. S., Chiumello, D., Luyt, C. E., Meyer, N. J., Sekiguchi, H., Matthay, M. A., & Meduri, G. U. (2016). Diagnostic workup for ARDS patients. Intensive care medicine, 42(5), 674–685. https://doi.org/10.1007/s00134-016-4324-5
- Sekiguchi, H., Schenck, L. A., Horie, R., Suzuki, J., Lee, E. H., McMenomy, B. P., Chen, T. E., Lekah, A., Mankad, S. V., & Gajic, O. (2015). Critical care ultrasonography differentiates ARDS, pulmonary edema, and other causes in the early course of acute hypoxemic respiratory failure. Chest, 148(4), 912–918. https://doi.org/10.1378/chest.15-0341
- Zompatori, M., Ciccarese, F., & Fasano, L. (2014). Overview of current lung imaging in acute respiratory distress syndrome. European respiratory review : an official journal of the European Respiratory Society, 23(134), 519–530. https://doi.org/10.1183/09059180.00001314
- Corradi, F., Brusasco, C., & Pelosi, P. (2014). Chest ultrasound in acute respiratory distress syndrome. Current opinion in critical care, 20(1), 98–103. https://doi.org/10.1097/MCC.0000000000000042